Orange Infused Choc Chip Cookies
This post is contributed by One Drop Business Manager – Kaye Ng.
With the festivities around the corner, its time to bake and indulge! hahaha 😝 At least, when the year end rolls by, I feel more like martha and feel inspired to get dirty in the kitchen. So off I went to bake some choc chip cookies with my little monster.
THEY WERE DIVINE and SUPER YUMMY! 😛
I took the recipe off this website. I’m super impressed by this young local NS boy from Singapore with a passion for baking. His recipes are well tested and easy to follow. Every time I bake using his recipes, I find my end results very delicious! Esp for an amateur baker like me, its rewarding to be able to follow a recipe blindly and get yummy goods at the end. 🙂
So, anyway, I baked his choc chip cookies 🍪 and added in a couple of drops of orange essential oil 🍊 to give it a tinge of a christmas-y edge. LOVE MAX. 😍
Here’s the recipe:
INGREDIENTS:
- 1 1/4 Cups All Purpose Flour
- 1/2 Cup Lightly Packed Brown Sugar
- 1/4 Cup Granulated White Sugar
- 1/2 Teaspoon Baking Soda
- 1/4 Teaspoon Salt
- 1/2 Cup Unsalted Butter Softened at Room Temperature
- 1 Large Egg at Room Temperature
- 1 Teaspoon Vanilla Extract
- 3/4 Cup Semisweet Chocolate Chips or Chocolate Chunks
- 4 Drops of Young Living Orange Vitality Essential Oil
INSTRUCTIONS:
1. Preheat your oven to 180 degrees C or 350F and line your trays with parchment paper.
2. Cream together the softened butter and the two sugars until light and fluffy.
3. Add in the egg and stir well until it is incorporated and there are no longer dark streaks from the egg yolk.
4. Add in the vanilla extract, salt and baking soda and stir until well mixed.
5. Stir in the flour and the chocolate chips until just combined. Stop when there are no more lumps of flour.
6. Drop in the orange vitality essential oil and stir until combined.
7. Drop by tablespoonfuls on the baking tray, leaving about 2.5 inches allowance for expansion during baking.
8. Bake for about 9-11 minutes or until golden brown around the edges.
9. Cool for about 10 minutes before serving.
DETAILS:
Prep time: 10 mins
Cook time: 20 mins
Total time: 30 mins
Cook time: 20 mins
Total time: 30 mins
I loved the taste of these cookies and they had a nice mild orangey smell to it. Go try and bake some for your friends this Christmas! 🎄
If you are interested in trying out the Young Living oils, or would like to find out more do drop me an email at kaye@onedrop.sg or sign up here to buy the products.

Solid Perfume
This post is contributed by One Drop Business Manager – Kaye Ng.
Commercial perfumes often give me a headache. Trust me, I have TONS. I have bought countless bottles of perfume only to spray them on, get into the car and get a massive headache AND a sneezing attack . It gets better the moment I get out of the car tho. BUT, its not because I sprayed half a bottle. I SWEAR – 3-5 spritz that’s all. Perhaps I’m just really sensitive to these scents.
Anyhow, so I decided to create my own solid perfume scents. These are like – balms with scents. So you just apply them as you go along and you can layer it as much as you want depending on how heavy you want the smell to be.
THE RECIPE:
- 3 Tbsp of Grapeseed Oil (or any carrier oil)
- 1 Tbsp of Jojoba Oil
- 1 Tbsp of Beeswax
- 20 Drops of Essential Oil
Directions:
- In a double boiler, melt the beeswax and the carrier oils together.
- Once melted, remove from heat and add essential oils, stirring well until combined.
- While HOT, pour your mixture into the container for your perfume.

Notes:
- Use a glass beaker with a lip to pour the melted solution into the containers or it will flow EVERYWHERE as the mixtures is thick.
- Work fast! Beeswax hardens very quickly and you might find yourself with a POT of harden beeswax which you cannot pour.
- Be careful of the type of scents you use. Some scents will not be strong esp as you pour them into a hot solution – effectively “cooking” the oils. However, the scent will get stronger after some time so don’t fret too much.
Here are some notes from this website on scents and how to create your own scent:
The Top Notes
Also sometimes referred to as the opening notes or head notes, the top notes of a fragrance are generally the lightest of all the notes. They are recognized immediately upon application of the perfume. The top notes are also the first to fade given their light molecular structure, but this does not mean they aren’t of utmost importance.
The top notes of a fragrance represent the first impression. How many times have you tested a fragrance only to be turned off right away? Why? Because the top notes didn’t make a lasting impression on you. It is hugely important that the top notes not only succeed at luring you in, but also smoothly transition into the heart of the fragrance.
Common fragrance top notes include citrus scents such as lemon, orange, bergamot, light fruits such as grapefruit and herbs like clary sage and lavender.
The Middle Notes
The middle notes, or the heart notes, make an appearance once the top notes evaporate. The middle notes are considered the heart of the fragrance. They last longer than the top notes and have a strong influence on the base notes to come. A perfume’s heart is generally pleasant and well-rounded. It is often a smooth combination of floral or fruit tones; sometimes infused with spices like cinnamon, nutmeg or cardamom.
Common fragrance middle notes include geranium, rose, lemongrass, ylang ylang, lavender, coriander, nutmeg, neroli and jasmine.
The Base Notes
The base notes are the final fragrance notes that appear once the top notes are completely evaporated. The base notes mingle with the heart notes to create the full body of the fragrance, but are typically associated with the dry-down period. The job of the base notes is to provide the lasting impression. These often rich notes linger on the skin for hours after the top notes have dissipated.
Common fragrance base notes include cedarwood, sandalwood, patchouli etc.
Without the combination of the three levels of notes, a fragrance just wouldn’t be aromatically appealing. But together, they create beautiful scents.
So go try and make your own scent. If all else fails, just use a beautiful scent already created from Young Living like Joy!
If you are interested in trying out the Young Living oils, or would like to find out more do drop me an email at kaye@onedrop.sg or sign up here to buy the products.

WHY I LOVE SAVVY MINERALS
This post is contributed by One Drop member – Kaye Ng.
Its been ages since I last wrote a blog post! GOSH! But with the new launch of the Savvy Mineral range coming to Singapore, I wanted to share thoughts and tips I have learnt from using SM on myself the last few months since I got my hands on them last year.
Ready? Here goes:
LETS GET THE BAD 💔 OUT OF THE WAY FIRST
Its a messy affair! Yup its MESSY ALRIGHT! You will find the powder and colours all over the sink and if you use the colours dry, you will find that you need more pigments and more layers to achieve the look you want. For me… that’s a major downer – the mess. BUT that being said I’ve found a way around my “problem” and you just need to get used to the “mess” if you are anal like me – FOILING.
FOILING
Foiling is a technique that gives the make up you put on a metallic shimmery look. I was never a fan of such shimmery looks. However there are benefits to foiling. Firstly, your make up becomes hyper pigmented. Means a little goes a long way. Secondly, you are applying the make up WET, so it doesnt fly everywhere! WHOOOPPPIE!


The first picture shows you the difference between using the make up dry and with water (foiling). You can see how the colours pop alot more with water added. You can also use the Savvy Minerals Spray too if you wish.
The second pic is for those of you who want a darker colour, but do not want so much powder flying everywhere and DO NOT WANT THE SHIMMER! BLEND! Once you blend with a blender brush, most of the shimmer will be gone, and you will be left with a nice dark tone. Lovely right? So this is how you can play with your make up to reduce the flying powder, either glam it up or tone it down!
Now lets talk abt what I do LOVE about this range of SM and how you could use the makeup for yourself
10 REASONS WHY I ❤ SAVVY MINERALS + TIPS
1. The foundation is awesome. It is light and it goes on without feeling heavy and making you look like some chinese opera singer. Best way to put it on – with the mineral spray den blend it it into your skin.
2. It doesn’t make your face oily and cakey and it covers all those hideous pores! In fact it absorbs the oils on your face! MAJOR LOVE because you wont be oily shiny by the end of the day! haha.
3. It last all day! Well at least on my skin it does. I have combination skin, and the makeup last from morning to night without me looking like my ghostly state at the end of the day.
4. The make up is buildable! You know how with other makeup, if you get too much blusher on your brush and brush it on to your skin, you might get a very pink patch on ur cheek that is hard to remove? Well, I’ve found that with the SM range, its very easy to build up colours and remove colours. If you have too much colour, just swipe it off lightly with a tissue and blend the rest in. If you didn’t get enough, just pick up a little more and add it. ITS SO EASY TO USE AND REALLY FORGIVING even if you are a make up noob.
5. Its super versatile! If you want your make up light, use them dry, if you want your make up to pop and go all glam glam, use it wet! ONE MAKE UP FOR NIGHT AND DAY! On top of that, you can use any of the products anywhere on your face. I personally use the darker foundation colours to do contouring.
6. Shimmer and shine – yup this range is shimmmerryy! I wasn’t a fan of this initially, but I’ve come to enjoy how the shimmer can brighten your skin and make you look just a tad more glamorous even if you are just headed out to the supermarket! hahah I’m frivalous this way! If you find that the makeup is too glitzy, just blend it in a little more and use it dry. This will help remove the glittery bits.
7. Moisturizing for your lips! I LOVE IT! I wore the lip gloss and lip stick together and was amazed how I could still feel it on my lips at the end of the day! Super long lasting and very moisturizing! I always use the lipstick followed by the lip gloss to give my lips an extra pop. I assure you, your lips will stay super moisturized with this combi.
8. The Multitasker is a must! This is one product that can be used as an eyeliner, eye shadow, eyebrow filler and to cover white hair. 4 products in one and it works gloriously! If you don’t like 4-in-1 products, you are not a woman! HEH. But honestly what’s not to love? You save money and use one prdt only!
9. Make your own colours. If you cant find a colour you like, or the foundation colours dont fit you exactly… MIX IT UP! I like to mix my eyeshadow and foundation colours. Try adding some diamond veil to your foundation too to give it a shimmery sheen like those korean dewy looks!
10. Keeping the best for last – SAFE! THIS MAKEUP IS SAFE. Safe for me and safe for my little one if I wanna swipe some blush on her while I get myself made up. Safe when I kiss her with my lipstick on. ❤
SO GO ALL OUT. Love the SM make up and try it once it hits our shores!
If you are interested in trying out the Young Living oils, or would like to find out more do drop me an email at kaye@onedrop.sg or sign up here to buy the products.

OILING TIPS FOR YOUR CHILD
This post is contributed by One Drop Business Manager– Kaye Ng
Mothers and new users of essential oils are always weary when it comes to oiling kids, but it actually isnt that difficult at all.
As long as you go by some basic safety rules, you can use any oil you want on your child. Essentially, the same oil you would use for an adult is also helpful for a child.
Lets go through a few SAFETY rules.
1. DILUTION: Always ensure that you dilute.
- Child below 2: Dilute 1 part EO to 1 part carrier oil
- Child between 2 to 4: Use one drop of EO
- Child above 4: Use 2 – 3 drops of EO
2. CHECK! Is the oil HOT?
Is it a hot oil? How do you know? Well, apply it on yourself. If it feels minty or hot on your skin, it means that it is going to be hot for your child too!
3. APPLY ON BOTTOM OF FEET.
As a general rule, apply all oils on the bottom of the feet. If you are working with a hot oil, it MUST go on the bottom on the feet. However, if you are working with their digestive system, you can always choose to apply the oil on their tummy, or perhaps even on the chest if you are dealing with respiratory support. HOWEVER, in doubt, just apply to the feet.
4. EMERGENCY! HELP!
Well, in all situations, kids or not, accidents happen. Oils can get onto the hands and get into the eyes. Oils can suddenly feel extremely hot on the skin and ur kid may start to cry. Don’t panic. Thankfully you are using oils! You are likely NOT to overdose on the oils. :)) In fact you probably will NOT unless u decide to drink 10 bottles of oils. All you need to remember when your child experiences discomfort when using the oils, NEVER USE WATER to wash the oil away. Oils and water does not mix. Washing away the oil with water actually pushes the oils further into the skin. Instead use a carrier oil to dilute and wipe away the excess oil after.
THATS ALL U NEED TO REMEMBER! Simple right? After you checklist and do the above safety, you can use any oil which is of relevance.
Here are some of my favorite oils to use to support the various body functions:
- NOSE: Breathe Again, R.C, Raven, Eucalyptus (all three), Peppermint
- CHEST: Idaho Blue Spruce, Dorado Azul, Balsam Fir, Raven, Cypress, Peace and Calming, Frankincense
- STOMACH: Digize, Aromaease, Ginger, Fennel
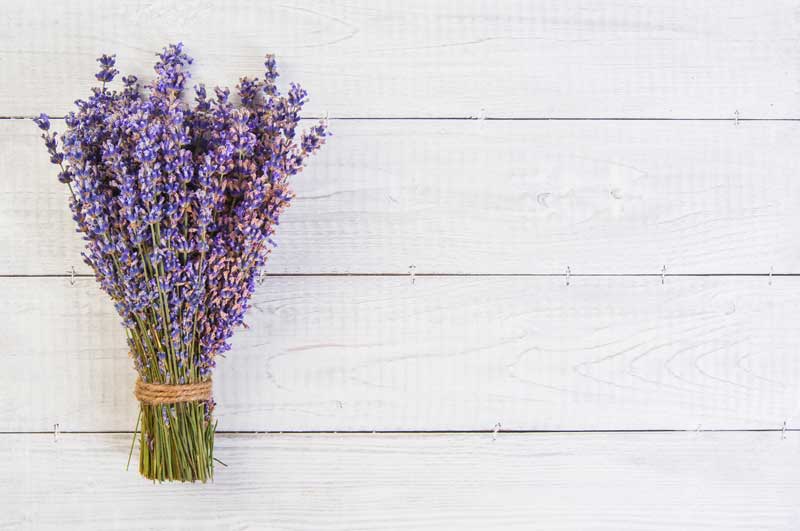
- SKIN: Lavender, Tea Tree, Purification
- IMMUNITY: Thieves, Immupower, Lemongrass + Eucalyptus, Exodus II
So now you know how and what to use, have no fear and start oiling happily!
If you are interested in trying out the Young Living oils, or would like to find out more do drop me an email at kaye@onedrop.sg or sign up here to buy the products.

10 SURPRISING WAYS TO USE YOUR EO & BOTTLE
This post is contributed by One Drop member – Kaye Ng.
Besides the normal uses of essential oils and their bottles, such as using digize for your tummy support, there are many other “cool” ways you can use your oils and the bottles too. Here is 10 other surprising ways that I use my oils and oil bottles for.
1. Turn them into an immediate reed diffuser by putting toothpicks into almost empty EO bottles.
2. Make flavored ice cubes for lemonade, water, or punch by adding a drop of essential oil to your ice tray. I love the citrus oils like lemon, lime, citrus fresh the BEST. If you want them prettier, add a mint leaf or a beautiful edible flower to each ice cube to make them pretty! You can also add fruits to give your drink an added yum factor.

3. Every drop of EO counts! When you are almost done with a skin-friendly essential oil, such as lavender, rose, helichrysum, or frankincense, add in your your toner of choice — such as witch hazel and you have your own toner right away!
4. Cotton balls! This is an essential oily tool to have. Stuff 2-3 cotton balls into an empty essential oil bottle and place the cap back on. Then let it sit overnight to soak up whatever oil is left. Remove the cotton the next day and right away you can put these cotton balls wherever you need such as in stinky shoes, in trash cans, in your car etc.
5. Make flavoured salt for cooking! Fill up your empty bottle of Vitality EO such as rosemary or lime with good quality edible salt like natural sea salt and pink himalayan salt and let it sit inside for more than 24 hrs. After that you are good to go! You know have salt for margaritas, fish, chicken, potatoes etc.
6. Such a simple idea, but use your bottles as mini flower vases!

6. Baking soda is your best friend. If you want to freshen up stinky places, buy a boy of baking soda. I normally buy a small box and drop in 5 – 10 drops of essential oils directly into the box and mix it up abit. To freshen up my refrigerator, I would then place the entire box INTO the fridge. It works wonders not absorb the smells and give my fridge a nice lemony (if i use lemon eo) scent after. Other times, I pour half a box of baking soda mixed with EO into the trash can or diaper pail before I put the bin liner on. Works wonders!
7. Disinfect your dish sponge! How many of you actually do this? Just because your dish sponge gets “washed” with soap doesnt mean that it doesnt harbour bacteria. In fact with all the water and food and oil particles, it can get rather nasty. Take your thieves oil or lemon oil and give a drop or two in a warm water basin and soak your sponge in there for a while. Helps kill everything!
8. Toilet air freshener? Drop a few drops of essential oil right into your brand new toilet rolls! Ta-dah right away you have a great smelling toilet!

9. Add your oils to your shampoos and body soaps. Well Young Living has the soap base where you can add your essential oils to, but you can also add them to your shampoos! Tea tree for example is a great one to add for a healthy scalp!
10. Drip oils everywhere. I know this sounds so simple, but some people dont realize that its really quite safe to drips oils everywhere so you can smell good stuff and freshen up areas wherever you go! These are some places that I love dripping my oils onto: Bed cover, Bathroom Mat, Car Mat, Dried Flowers and even directly on my clothes esp if they are dark coloured and made of a hardy material like denim.
What ways do you use your oils? Share them with us, we would love to know!
If you are interested in trying out the Young Living oils, or would like to find out more do drop me an email at kaye@onedrop.sg or sign up here to buy the products.